META DESCRIPTION: Learn everything about rainwater harvesting for your small homestead with our comprehensive 2024 guide. Discover collection methods, storage solutions, and practical tips to maximize your water sustainability. Perfect for beginners!
Did you know that a 1,000 square foot roof can collect approximately 600 gallons of water from just 1 inch of rainfall? That’s enough to sustain a small garden for weeks! As more homesteaders seek sustainable solutions, rainwater harvesting has become increasingly vital. I’ve spent years helping small homestead owners design and implement rainwater collection systems, and I’m excited to share everything I’ve learned along the way.
Understanding the Basics of Rainwater Harvesting
I’ll never forget my first attempt at rainwater harvesting – it was honestly a bit of a disaster! I had placed a few random barrels under my gutters and thought I was good to go. Let’s just say that after the first big storm, I learned that proper planning is everything in this game.
Rainwater harvesting is actually pretty straightforward once you understand the basic concept. Think of it like setting up a giant drinking straw for your property – you’re essentially collecting water that would normally just run off your roof and storing it for when you need it most.
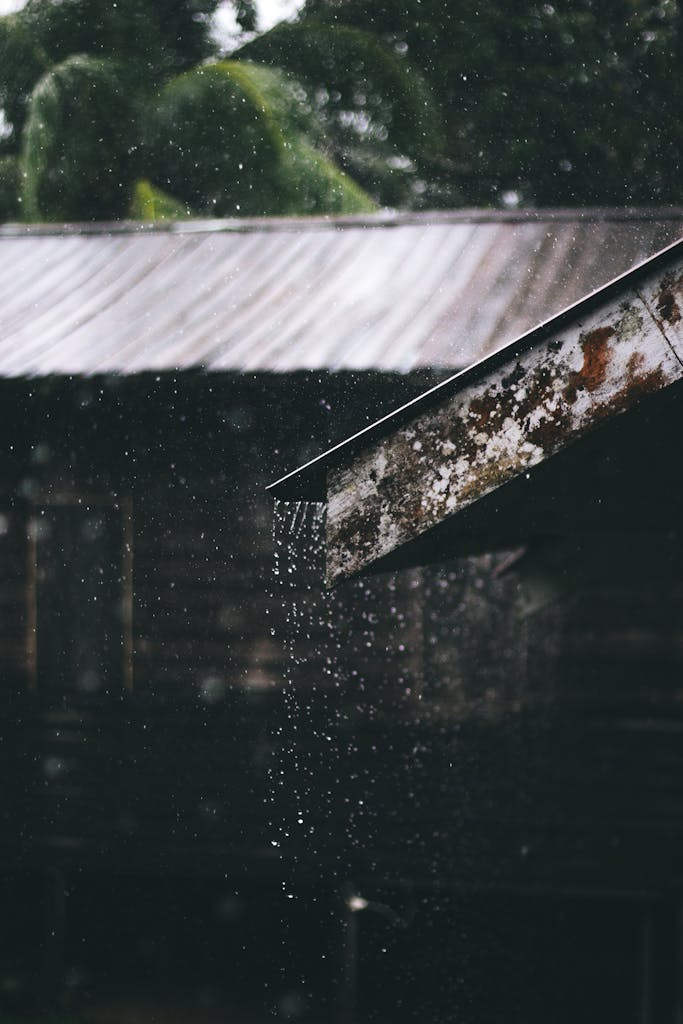
The simplest system (and the one I always recommend for beginners) is what we call a “roof-based collection system.” Your roof acts as the collection surface, your gutters as the transportation system, and your storage tanks as, well, storage! But here’s something I wish someone had told me early on – not all roofing materials are created equal when it comes to harvesting rainwater.
For small homesteads, I typically recommend starting with a basic gravity-fed system. After helping dozens of homesteaders set up their first systems, I’ve found that keeping things simple initially leads to better long-term success. You can always add complexity later!
Here’s a crucial tip that took me years to figure out: before you purchase a single component, check your local regulations! I once helped a friend set up an entire system, only to discover that their county required special permits for tanks over 500 gallons. Trust me, you don’t want that headache!
The benefits for small homesteads are pretty amazing. One of my clients reduced their municipal water usage by 60% during the growing season! Beyond the obvious water savings, I’ve seen folks use their harvested rainwater for:
- Watering gardens during drought periods
- Providing clean water for livestock
- Reducing erosion around buildings
- Creating emergency water storage
But let’s talk about something that often gets overlooked – water quality. Rainwater is naturally soft and free from many of the minerals found in ground water, which makes it fantastic for gardens. Your plants will thank you! However, if you’re planning to use it for drinking water, you’ll need additional filtration and treatment systems.
One mistake I see a lot of beginners make is underestimating their storage needs. Here’s a little secret: it’s better to start with more storage capacity than you think you’ll need. I learned this the hard way during my first dry season when my modest 500-gallon system ran dry just when my tomatoes needed it most!
Think of rainwater harvesting as an investment in your homestead’s future. While the initial setup costs might make you wince (been there!), the long-term benefits to both your wallet and the environment are absolutely worth it.
Planning Your Collection System
You know what’s funny? The most common question I get from new homesteaders isn’t about tanks or filters – it’s “How do I know how much water I can actually collect?” Let me break this down in a way that changed my whole approach to system planning.
First, grab a calculator – we’re going to do some quick math! For every square foot of roof space, you can collect about 0.6 gallons of water per inch of rainfall. I learned this formula after my first system fell short of my expectations. For example, my 1,200-square-foot roof section yields about 720 gallons from a single inch of rain. Pretty impressive, right?
But here’s the real game-changer I discovered: it’s not just about how much you can collect – it’s about how much you actually need. Keep a water diary for a month. Track everything from garden watering to animal needs. This simple step saved me from making a $2,000 mistake on oversized tanks!
Essential Components and Materials
Let me tell you about what I call the “Friday night emergency” that taught me the importance of quality components. Picture this: it’s starting to rain, and suddenly I hear water gushing where it shouldn’t be. My cheap gutter connection had completely given way! Since then, I’ve become pretty passionate about using the right materials.
For gutters, I swear by seamless aluminum. Yes, they’re a bit pricier than vinyl, but they’ve survived everything from heavy snow to falling branches at my place. Pro tip: spend the extra money on professional-grade gutter guards – they’re worth every penny when you’re not cleaning leaves out of your system twice a month like I used to!
When it comes to storage tanks, don’t do what I did and just grab the cheapest option. After replacing my first tank due to UV damage, I learned that dark-colored, UV-resistant polyethylene tanks are worth the investment. My current setup uses a 1,500-gallon tank that’s going strong after five years.
Step-by-Step Installation Guide
Installing your system doesn’t have to be overwhelming! I remember staring at all the components in my driveway, feeling totally lost. But let’s break this down into manageable steps that even a beginner can handle.
Step 1: Plan Your System
Before starting, assess your homestead’s water needs and available space. Consider:
- Water Usage: Will you use the water for irrigation, livestock, cleaning, or drinking (requires filtration)?
- Roof Catchment Area: Calculate how much rainwater you can collect based on roof size and average rainfall. (Formula: Roof Area (sq. ft.) × Rainfall (inches) × 0.623 = Gallons Collected).
- Storage Needs: Choose tank size based on your estimated water needs.
Step 2: Gather Materials
You’ll need:
- Collection Surface (Metal, tile, or asphalt shingle roof)
- Gutter System (Vinyl or aluminum gutters with downspouts)
- Leaf Guard & First Flush Diverter (To remove debris and initial dirty rainwater)
- Storage Tank (Food-grade plastic barrel, IBC tote, or larger cistern)
- PVC Pipes & Fittings (For directing water into the tank)
- Spigot & Overflow Outlet (For controlled water use and excess water drainage)
- Cinder Blocks or Wooden Stand (To elevate the tank for gravity-fed pressure)
Step 3: Install the Gutter System
- Attach Gutters: Secure gutters along the roof edge, ensuring they slope slightly toward the downspout (¼ inch per 10 feet).
- Install Downspouts: Connect downspouts to direct water toward the storage tank location.
- Add a Leaf Guard: Place a mesh screen or gutter guard to prevent leaves and debris from entering.
Step 4: Set Up the First Flush Diverter
- Cut a T-joint into the downspout to divert the first few gallons of dirty rainwater.
- Attach a PVC pipe (3-4 feet long) vertically below the T-joint.
- Install a slow-draining valve at the bottom to gradually release dirty water.
- Connect the clean water outlet to the storage tank inlet.
Step 5: Prepare the Storage Tank
- Elevate the tank on cinder blocks or a sturdy wooden platform for better water pressure.
- Drill an inlet hole near the top to connect the downspout.
- Drill an overflow outlet near the top to prevent overflow damage (direct excess water to a garden or drain).
- Install a spigot near the bottom for easy access to water.
Step 6: Connect the System
- Attach the downspout to the tank’s inlet hole using a sealed PVC connection.
- Secure the overflow pipe and direct it away from structures.
- Ensure all connections are sealed with waterproof caulk or rubber gaskets.
Step 7: Test and Maintain the System
- Run a test by pouring water on the roof and checking for leaks or blockages.
- Regular Maintenance:
- Clean gutters and leaf guards monthly.
- Flush the first flush diverter regularly.
- Check for algae growth (keep the tank shaded or use opaque material).
- Inspect seals and spigot for leaks.
Optional Add-Ons for Better Performance

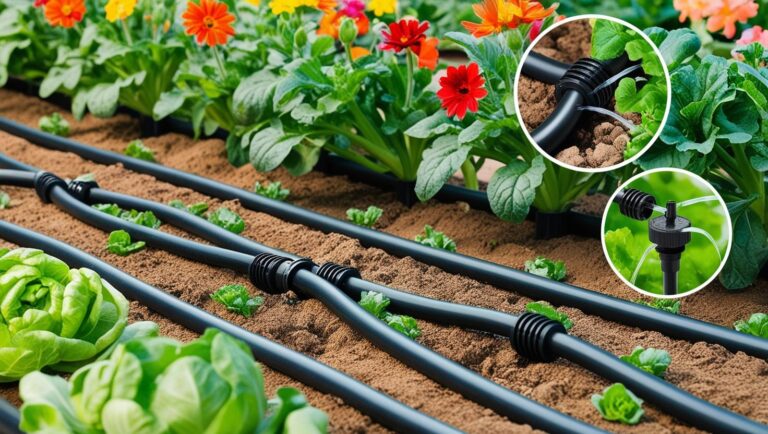
Drip Irrigation: Connect the tank to a drip irrigation system for automatic watering. Use a level and some string to mark the perfect line. This simple trick has saved countless hours of adjusting and readjusting.
Filtration System: If using for drinking, install a fine mesh filter, activated carbon filter, and UV sterilizer.
Pump System: For pressurized water delivery, add a small electric or manual pump.
Using Harvested Rainwater Effectively
This is where all your hard work pays off! I’ve developed some pretty clever ways to maximize every drop of harvested water. My favorite trick? I installed a simple gravity-fed drip irrigation system that waters my garden beds automatically. The plants get exactly what they need, and I save hours of hand-watering time.
For livestock, I use a float valve system in their water troughs. This was a game-changer during our last dry spell – the animals always had fresh water, and I wasn’t constantly refilling containers. Just make sure to clean the troughs regularly; I do mine weekly.
After years of helping folks set up their rainwater harvesting systems, I can honestly say it’s one of the most rewarding projects for any small homestead. Yes, there’s an initial learning curve (and maybe a few funny mistakes along the way), but the independence and satisfaction of collecting your own water is absolutely worth it.
Remember, start small if you need to, but start somewhere. Even a simple rain barrel under your gutter can save thousands of gallons of water each year. Trust me, your garden, your wallet, and our planet will thank you!
Ready to get started? Take that first step today – measure your roof area and start planning your system. And don’t worry if you make a few mistakes along the way – we all do! The important thing is to begin your journey toward water independence.
Have questions about setting up your own system? I’d love to hear about your plans in the comments below. Here’s to your successful rainwater harvesting journey!